Support / Quick Start Guides / Handheld Remote Quick Start Guide
Handheld Remote Quick Start Guide
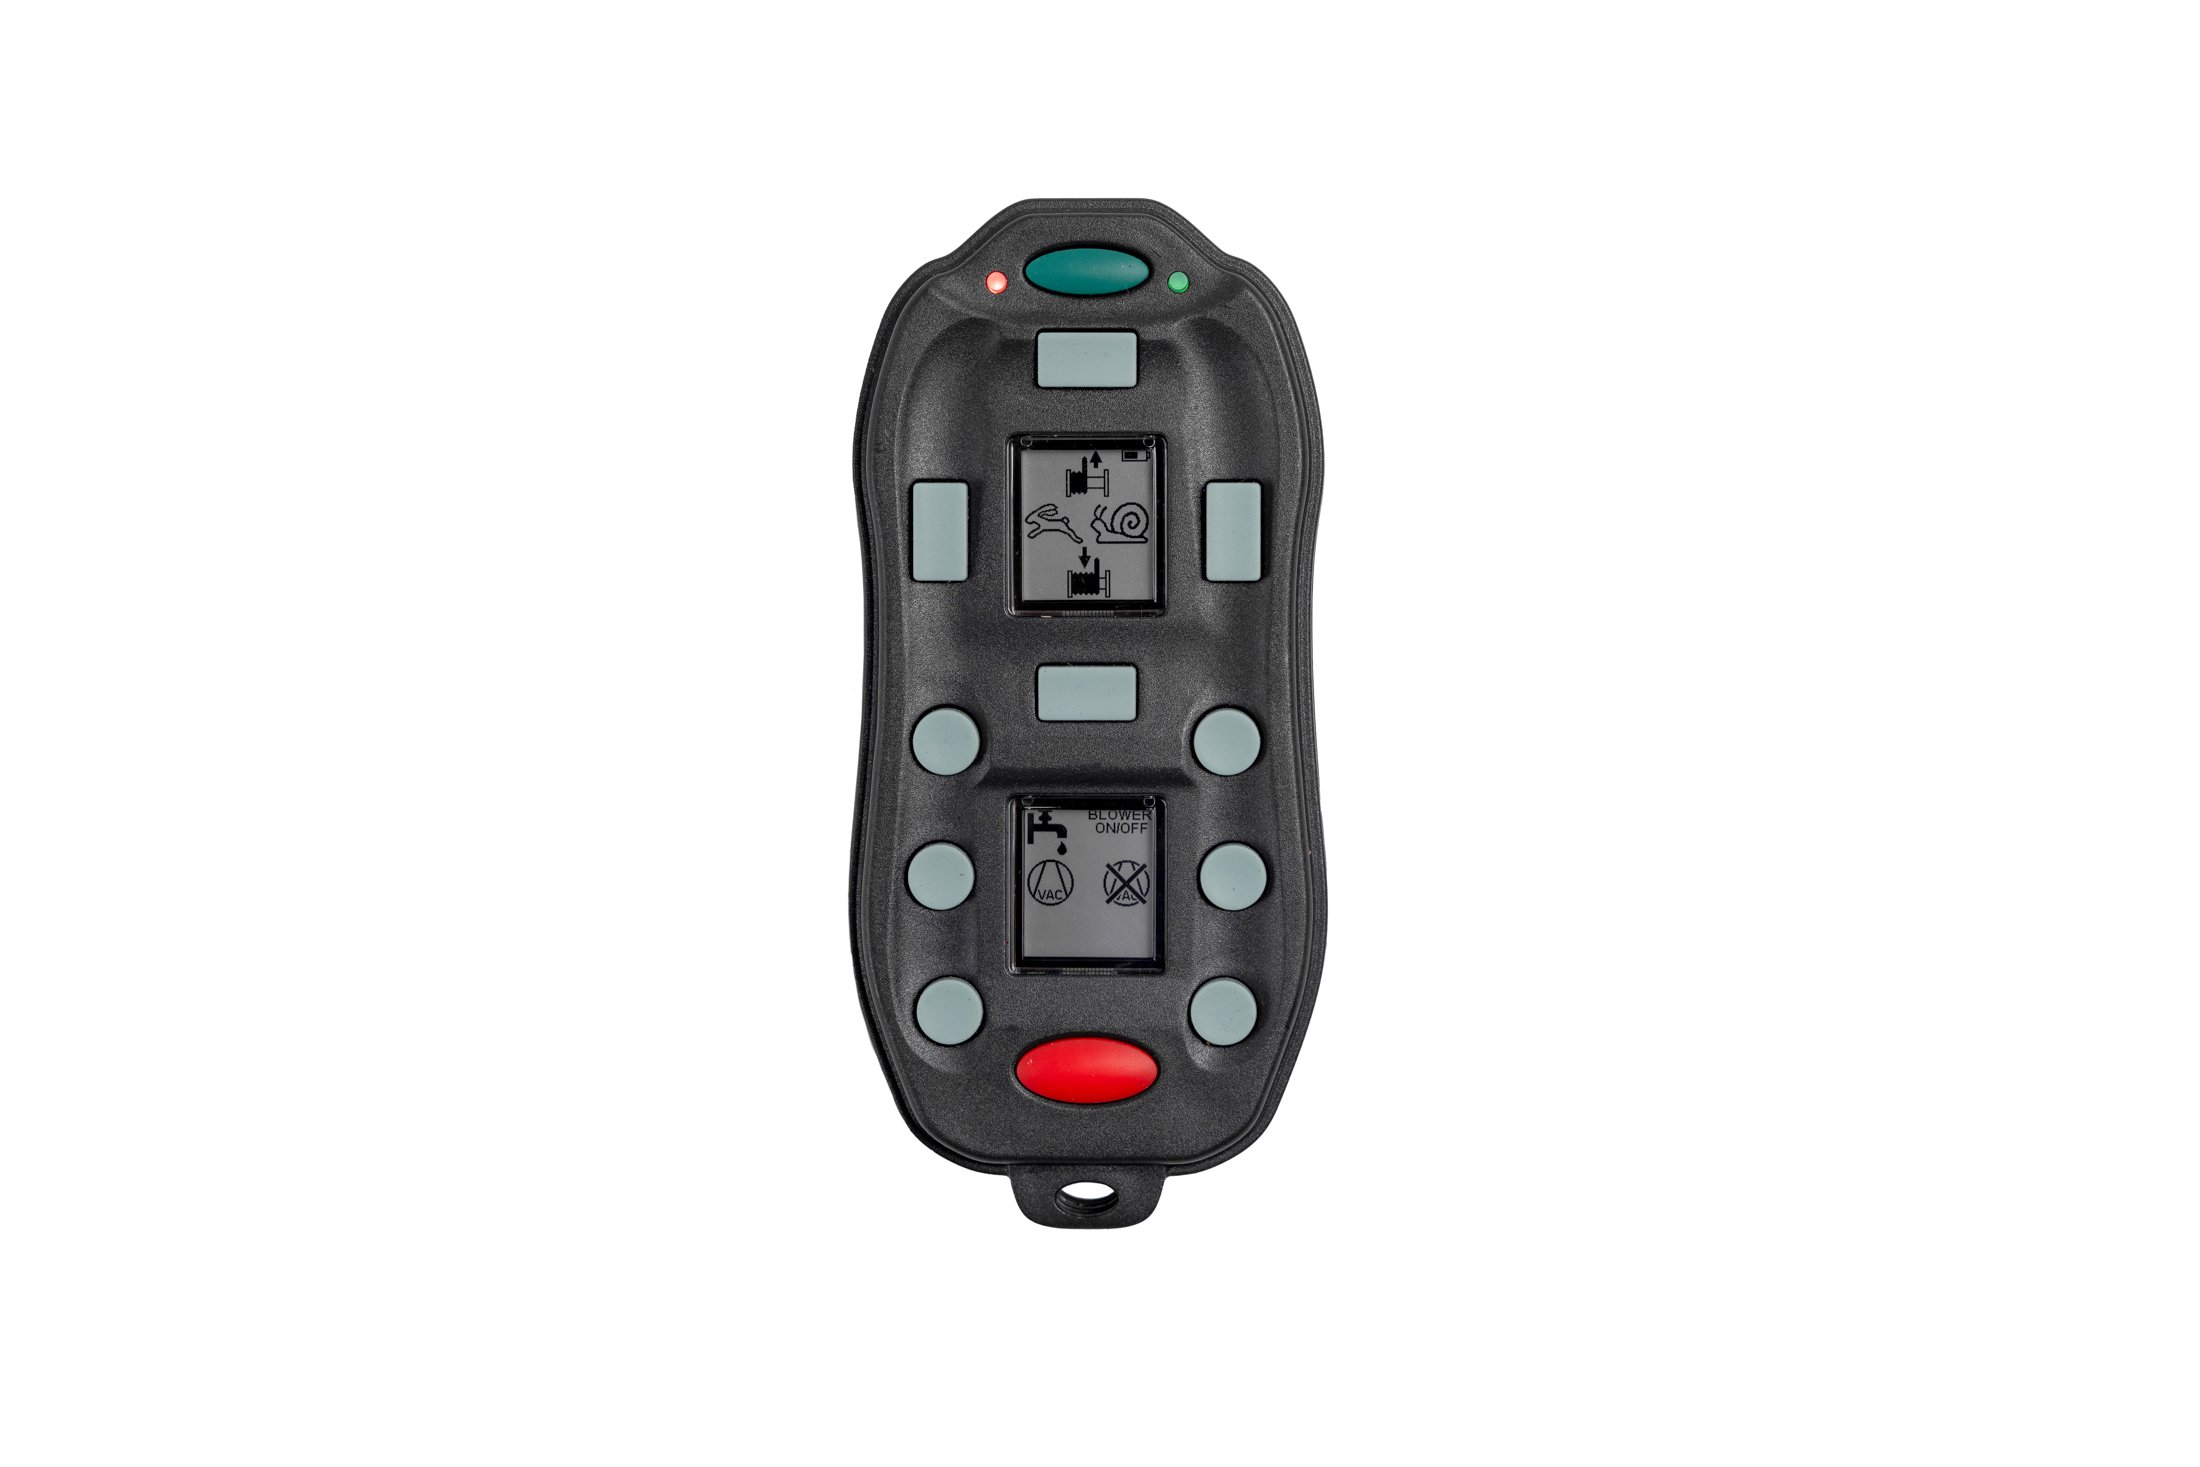
Aarcomm’s HHT Handheld Quick Start Guide provides support for the following items, included in your HHT remote control system:
HHT handheld
C220/C200 receiver
Antenna
Charging cradle
Wiring harness
Quick links:
Powering on the handheld
The HHT handheld requires a special sequence to turn on to ensure all buttons are working correctly prior to start up, and minimize any accidental powering up of the handheld.
To power up the HHT:
Press and hold the RED BUTTON
Press and hold the GREEN BUTTON
Release the RED BUTTON
Release the GREEN BUTTON
> Regular flashing GREEN LED: System turned on but no link.
> Solid, or short flashes of GREEN LED: System turned on and linked

Matching Instructions
First Method
Turn off the HHT
Apply power to the C220.
Momentarily (“blip”) the power off to the C220 six to seven times (i.e. power off for 1/2 second, power on for one second; six times). Leave the power on after the sixth blip.
The LED on the C220 will light up dark blue.
Continue with steps five to eight below in second method.

Second Method
Turn off the HHT.
Apply power to the C220.
Using a smooth motion, wave the HHT back and forth over the top left corner of the C220 so that the two magnets under the RED and GREEN BUTTON pass over the surface of the Aarcomm logo.
If the C220 successfully detects the magnets on the HHT, the C220 LED will light up dark blue.
Press and hold the three round buttons on the bottom left side of the HHT.
Press and release the RED BUTTON on the HHT
The C220 LED will turn white and a message will appear on the HHT indicating a successful match. If not, make sure the HHT and the C220 have compatible part numbers.
Power on the HHT normally to verify that the system is matched.

Powering off the HHT Handheld
Press the RED E-STOP BUTTON to shut down the HHT handheld
The LCDs on the HHT will go into sleep mode and will not draw any power from the battery.
C220 Mounting
The C200 and C220 receivers are designed to withstand water and have an impressive IP67 rating. For optimal performance, it is recommended to select a mounting location that offers protection from both weather conditions and excessive vibration.
C220 Wire Harness Installation
The C200 and C220 receivers are designed to withstand water and have an impressive IP67 rating. For optimal performance, it is recommended to select a mounting location that offers protection from both weather conditions and excessive vibration.
Antenna Installation
The mounting location should be chosen such that the C200 and C220 receiver antennas has the best possible line of sight with the Handheld in order to maximize the operating range. The standard antenna mount provided is an NMO type. It requires a 3/4” hole.
When installing with a hole saw, remove any burrs, particularly on the under side of the hole.
Remove paint in a narrow ring around the hole.
Metal-to-metal contact between the vehicle and the mount is essential for best performance.
An optional L-bracket can also be supplied if it is not possible to cut a 3/4” hole on the mounting surface.
Make sure the gold contact on the mount is clean before attaching the antenna.
For proper antenna contact, the supplied rubber gasket is required for metal thicknesses ranging from 0.030” to 0.050”. The gasket is not required for thicknesses from 0.050” to 0.100”.
Technical support
For technical support, call us at 1.604.265.8500 or 1.800.604.9218, or email our team at support@aarcomm.com.